本日はAzure調査枠です。
先日Azure Custom neural voiceを試しました。
これは声のDeepFakeを作成することができるMicrosoftAzureのサービスで、音声のトレーニングを行うことでトレーニングした人の音声で音声読み上げが行うことができる機能です。
これはAzureのアカウントがあればだれでもすぐに試すことができますが、セキュリティやプライバシーの関連で機能制限がかかっています。
これを解除して全機能を使用するためにはMicrosoft のCognitive Serviceチームに対してユースケースを明記して申請を行う必要があります。

今回はこの申請が無事に通ったためUnityで使用していきます。
今回はプロトタイプと検証を目的に申請しており、申請したユースケース以外の利用用途はできません。
今回の場合はパブリックなアプリなどでは使用できないということになります。
〇デプロイ
今回はすでにトレーニング済みの状態から始めます。
トレーニングまでの使用は以前の記事をご覧ください。
①Azure CognitiveserviceのSpeech Studioを開きます。
②モデルのデプロイのタブを選択します。

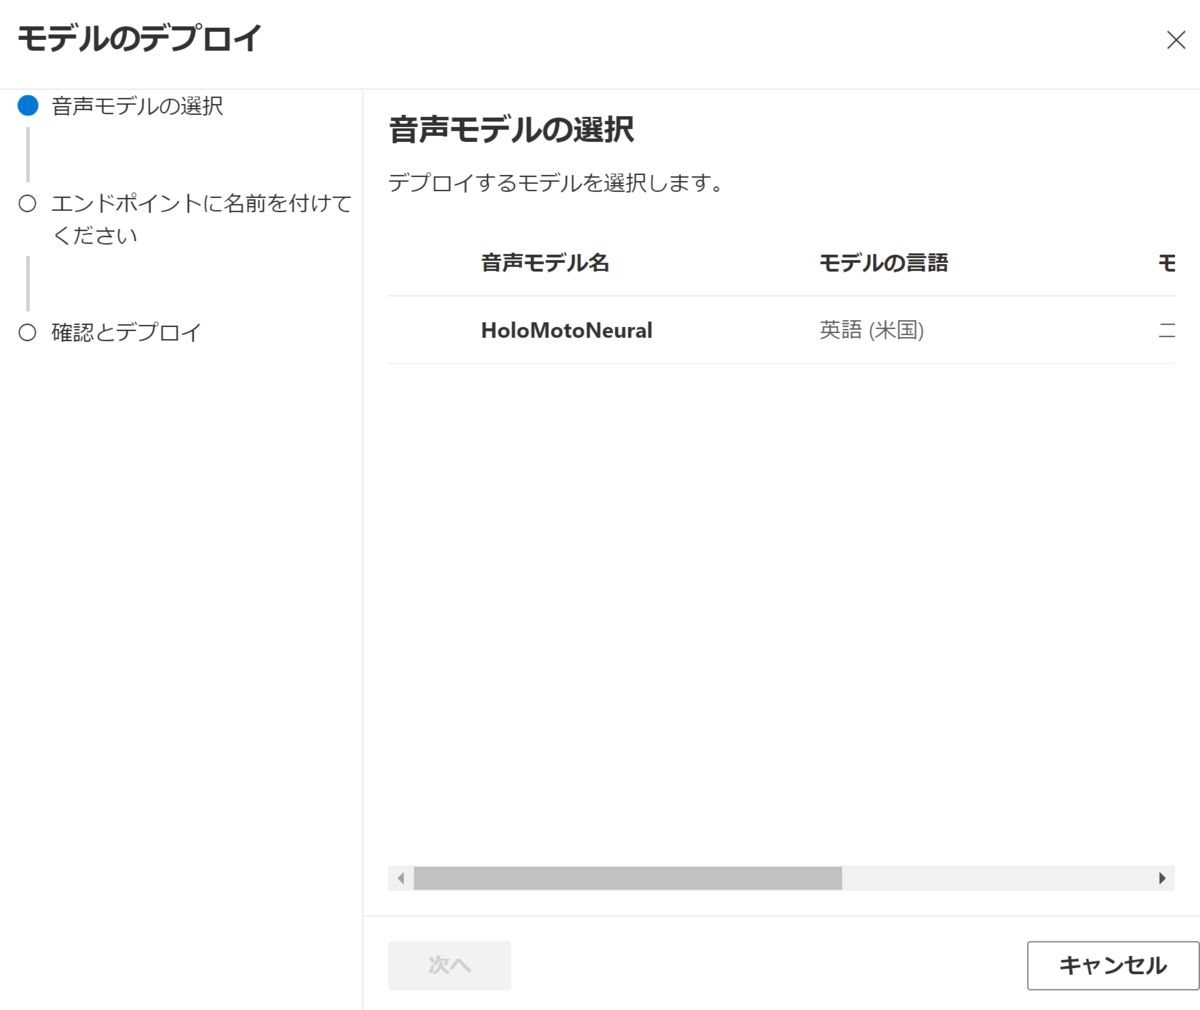
③モデルのデプロイを選択します。

④ここで使用するモデルを選択し、説明などを記述しフローに従いデプロイを行います。
これによってデプロイが行われます。
⑤モデルのエンドポイントキーおよびURLを確認します。

〇Unityでのコード
UnityでAzure Speechサービスを使用するためにはUnity用のAzure Speech SDKを導入します。
これはMicrosoftのドキュメント内で公開されています。

次に適当なオブジェクトにAudioSourceをアタッチし、次のスクリプトをアタッチします。
using System;
using System.IO;
using System.Threading.Tasks;
using Microsoft.CognitiveServices.Speech;
using Microsoft.CognitiveServices.Speech.Audio;
using UnityEngine;

public class CustomVoiceFirstStep : MonoBehaviour
{
    string subscriptionKey = "サブスクリプションキー";
    string subscriptionRegion = "リージョン";
    [SerializeField,TextAreaAttribute]
    string text ;
    AudioSource _audio;
    private void Start()
    {
        _audio = this.GetComponent<AudioSource>();
        VoiceStart();
    }

    async void VoiceStart()
    {
        var config = SpeechConfig.FromSubscription(subscriptionKey, subscriptionRegion);
        config.EndpointId = "エンドポイントキー";
        config.SpeechSynthesisVoiceName = "モデル名";

        string fileName = @"sample.wav";

        using (var fileOutput = AudioConfig.FromWavFileOutput(fileName))
        using (var synthesizer = new SpeechSynthesizer(config,fileOutput))
        {
            using (var result = await synthesizer.SpeakTextAsync(text))
            {
                if (result.Reason == ResultReason.SynthesizingAudioCompleted)
                {
                    var sampleCount = result.AudioData.Length / 2;
                    var audioData = new float[sampleCount];
                    for (var i = 0; i < sampleCount; ++i)
                    {
                        audioData[i]=(short)(result.AudioData[i * 2 + 1] << 8 | result.AudioData[i * 2]) / 32768.0F;
                    }

                    // The output audio format is 16K 16bit mono
                    var audioClip = AudioClip.Create("SynthesizedAudio", sampleCount, 1, 16000, false);
                    audioClip.SetData(audioData, 0);
                    _audio.clip = audioClip;
                    _audio.Play();

                    Debug.Log($"Speech synthesized for text [{text}], and the audio was saved to [{fileName}]");
                }
                else if (result.Reason == ResultReason.Canceled)
                {
                    var cancellation = SpeechSynthesisCancellationDetails.FromResult(result);
                    Debug.Log($"CANCELED: Reason={cancellation.Reason}");

                    if (cancellation.Reason == CancellationReason.Error)
                    {
                        Debug.Log($"CANCELED: ErrorCode={cancellation.ErrorCode}");
                        Debug.Log($"CANCELED: ErrorDetails=[{cancellation.ErrorDetails}]");
                        Debug.Log($"CANCELED: Did you update the subscription info?");
                    }
                }
            }
        }
    }
}
最後にtextに任意の文字を入力することでカスタムした音声で読み上げが行われます。
こちらは私の師であるがちもとさんの記事を参考にしています。